HP nc6120

This report is listed on Linux on Laptops and TuxMobil.
Introduction
A few weeks ago I decided to buy a new notebook. My old one, a Toshiba Satellite 4090 XCDT was a good friend for me. And running Linux on it was very easy.
First I thought I should buy a Toshiba again. But in these days there are many notebooks with a WXGA resolution. I don’t like it, because the notebooks are getting very big with this display dimensions. I didn’t want a standard XGA display either. After searching the web for a while I decided to get a SXGA notebook. I compared prices and Linux compatibility for different models and found this HP NC6120. The price machine I used told me the best price for Amazon. Then I thought, OK - let’s have a look on ebay. And there I got it for 150 Euro less than at Amazon.
HP is supporting the Ubuntu community to adapt their distribution to this and a few more notebooks. First I tried Ubuntu on my new notebook. But I realized very early, that this is not my distribution. I’m using Debian now for a long time. And I also want to have it on my Notebook. Since Ubuntu is a Debian based distribution, I thought it should be easy to get Debian running. But this is not true. Hopefully the following hints will help some people out there to get happy with Debian on their NC6120. It is a great notebook!
Experience
The NC6120 is a nice and solid notebook. It has a nice and homebred design, keys and connectors in the right place and
is easy to handle. I have no special negative experience with it. Only the BIOS, especially the VGA BIOS could be
updated (See X11 section.
The surface of the notebook, right where the keyboard is located, is of some kind of metal or high quality plastics and
feels very well. The temperature in this area is low, which makes the work more comfortable. A Dell Latitude D505 I use
at work gets very hot on the left side. I don’t like that, especially in the summer.
People often ask for the fan. I have to say, that the fan is running very often. So the NC6120 is not really a quite notebook. Of course I’m not an expert in notebooks, but I think it is more or less normal for a notebook of this power range. Compared to the Dell Latitude D505 I would say that they are on the same level concerning the fan usage. And the Dell has 100 MHz less than the HP. But I can’t recommend this notebook for people looking for a quiet notebook.
The power of this computer is good. I used an AMD Athlon XP+ 1700 in my desktop before. Compared to that I don’t miss anything. But I don’t play games. What I’m doing is mainly eMail, Internet browsing, writing text and write/compile software. In this case compiling is the killer application. The speed is good except you are on battery and use the powersave governor ;-) .
The screen has a very good quality and is good for many hours of work. It has a good brightness. Maybe the lower area of the screen is a little bit more bright than the top. But that doesn’t hurt.
I didn’t measure the capacity of the standard battery yet. I think it’s around 3 hours with permanent normal work, but I will check that later.
The loudspeakers are not too bad for a notebook. They are good enough to watch a film, but not to enjoy music. Compared to the Toshiba 4090 they are much better. But I still recommend some earphones or external loudspeakers.
Update 10.11.2007
The problems with the VGA BIOS are solved for me now, see the updates in the X11 section.
For the fan I can say that it is very quiet now. I use undervolting for the CPU now. It is great! See the Power management section for more information.
System overview
There are more pictures on the next page.
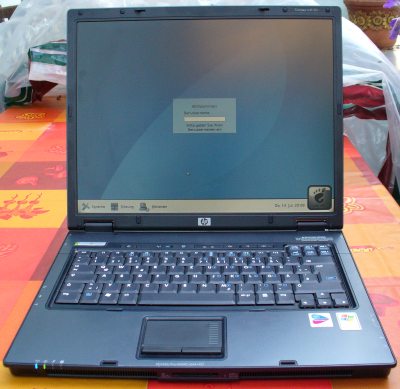
My NC6120 has the following technical data:
- 15 inch SXGA TFT (1400x1050)
- Intel Centrino (ICH6) chipset (Sonoma)
- Intel Pentium M 750 processor with 1.8 GHz
- 512 MB DDR Ram
- 60 GB hard disk (5400 rpm)
- CD-RW/DVD combo drive
- Bluetooth module
- Intel IPW 2200 WLAN
- Broadcom NetXtreme BCM5705M Gigabit Ethernet
- AC 97 modem
- IrDA port
- 4x USB, serial, parallel, TV out, VGA, Firewire, 2x CardBus,
- Modem, LAN, microphone, earphones, multi card reader
And here a short and a long version of the lspci output. To check the kernel modules which are used in my Debian installation, I created a list of them. Not all of them are necessary, of course. There are also some for NFS, IPSec and so on.
Update 09.01.2007
Here is a new list of loaded modules. Currently I use the 2.6.19.1 vanilla Kernel.
Update 10.11.2007
Again an updated list of the loaded modules. Now for Kernel 2.6.23.1.
Basic installation
I started with Debian Sarge. But now I use the testing tree to have more recent software available. Testing is stable and bug free enough to have it on a desktop machine. I chose the “Desktop” installation in the new installer. After all packages were installed, I had to install acpid and acpi to get control over the ACPI functionality. Especially the fan has to be controlled because the notebook is getting hot otherwise. I don’t know whether there is a boot parameter for the Debian installation process to enable ACPI. In my case there was no ACPI support and no fan cooling down the notebook. Later I found out that you can force the fan to be enabled while the notebook is connected to external power in the BIOS. Maybe you should set it for the installation process.
Next thing to install is the package 855resolution to manipulate the video modes the BIOS is reporting to X. I had to download the newest version of 855resolution (0.4) from http://perso.wanadoo.fr/apoirier/. Debian Sarge has version 0.3 included, but this is not able to manipulate my Vesa BIOS. I compiled the new version and copied the binary over the one from the Debian package. You can also try 915resolution from http://www.geocities.com/stomljen/ which is a port of 855resolution for the i915 chipset. I didn’t really test it, but it seems to work.
To get mouse support on the console I installed gpm. The Synaptics touchpad can be accessed via /dev/psaux. The
protocol is synps2.
Additionally to the modules getting loaded at boot time I added some more to /etc/modules. The file is
here. I also grab a script from the Ubuntu
installation which was created by HP and makes some settings for the display output and special keys on the NC6120.
Kernel
First thing I had to do was to build my own vanilla kernel. The newest version was 2.6.12 that days. The configuration
can be found here. I’m still playing around with the configuration, but I
think the main parts are configured properly
now. To have a nice resolution even on the console I use the Vesa frame buffer. The parameter vga=795 enables 1280x1024
resolution with 32 bpp colour. I don’t know whether this is the highest mode, but it is OK for the moment. When I have
more time I will try the intelfb frame buffer, but I didn’t get it running yet.
With the normal configuration the notebook is not able to reboot. Add the kernel parameter reboot=b to the grub or lilo
configuration. It fixes this problem.
Update 17.07.2005
I now played around with the different ACPI suspend modes and therefore patched my kernel with the newest stable
(2.1.9.5) Software Suspend 2 patch. The new configuration is here.
You have to modify the standard resume partition
in the kernel configuration (Power Management Options -> Software Suspend 2 -> Default resume device name). Download
the Software Suspend 2 patch from http://www.suspend2.net/ and decompress it. Then go to
your kernel source directory.
Apply the patch via /path-to-patch/apply. If no errors are reported you can recompile the kernel. After compiling and
installing it, you have to recompile the ipw2200 driver, too. For further information have a look at the power
management section.
Update 09.01.2007
I have updated to Kernel 2.6.19.1 and don’t use any patches any more. But I didn’t try Software Suspend yet, so this
patch might still be necessary. You can find the new configuration file
here.
Update 10.11.2007 Now I use Kernel 2.6.23.1. It is working fine. You can find a configuration here. It is configured to be used with PowerTop and Linux-PHC to reduce the power consumption (see Power management section).
Wireless LAN (IPW2200)
Wireless LAN is running well here. I downloaded the newest driver (1.0.4) from
http://ipw2200.sourceforge.net/.
In addition you need the appropriate firmware image and a patch for kernel 2.6.12. After decompressing the driver
package, you have to apply the patch. Change the current directory to the root directory of the driver package and use
patch -p0 < driver.patch. Then run make and make install. For this step you should already run the new kernel.
Otherwise the driver gets compiled for the version you are currently running. I copied the decompressed firmware to
/usr/lib/hotplug/firmware. Try modprobe ipw2200 now. It should be loaded without trouble. Interesting is the parameter
led=1. It enabled support for the blue LED of the NC6120. It is experimental at the moment, but works very good for me.
Since I have compiled the kernel with module autoloader support, I had to find a way to pass this parameter to the
module when it is loaded automatically in boot process. I added a file called ipw2200 to /etc/modutils and put the
line options ipw2200 led=1 into it. After running update-modules the modules.conf file gets modified and the parameter
is passed to the module if it is loaded by the kernel.
Update 17.07.2005
Now I use version 1.0.6 of the ipw2200 driver. The installation procedure is the same like for the old version except
that you now have to install the ieee80211 driver package. It can be found on http://ieee80211.sourceforge.net/. I use
version 1.0.3 of it. Just unpack it and run make and make install. After that you can compile the ipw2200 driver. If
you have an old version of the ipw2200 driver installed, delete all related files under /lib/modules/[your-kernel] and
reboot the notebook before compiling the new drivers.
Update 09.01.2007 The drivers are now included in the Vanilla Kernel. I use Kernel 2.6.19.1 and the drivers work very well.
LAN (Broadcom Gigabit Ethernet)
The integrated gigabit Ethernet controller works out of the box. It uses the tg3 kernel module.
X11
I took a configuration file from the Ubuntu installation I still had on my notebook. You can find it
here. On Sarge
there is no driver for the i810 or i915 graphics card included. The only way to get it running is the VESA driver in
combination with the 855resolution tool (see basic installation section). You have to patch a mode to 1400x1050
resolution. Change the configuration file /etc/default/855resolution to MODE=5a, XRESO=1400 and YRESO=1050. Otherwise
you can only get 1280x1024. This is also OK, but I want to use the full resolution and all lower resolutions are a
little bit unsharp.
But now the performance is very poor and there is no DPMS support to disable the back light when xscreensaver is
running. To add i810 and i915 support to XFree I downloaded the newest driver (20050621) from
http://dri.freedesktop.org/snapshots/. Normally these packages are for the
Xorg server, but they also work for XFree.
The installation is very easy. Just run install.sh. If compiling of the kernel modules fails, don’t worry. If you use
my kernel configuration, you already have a proper kernel module in place. The install script just adds support for
this kernel module to XFree. Now you can use the i810 driver in X. It automatically switches to the i915 kernel
module. Now there is DPMS support under X and the performance is much better. Especially movies are running much
better. With the Vesa driver you can’t watch movies in full screen mode.
I still have a problem with the external VGA output. When I start the notebook in my docking station, I don’t get the correct resolution on my external TFT (1280x1024). There is still the 1400x1050 resolution used (BIOS, Linux console and X) and only a section is shown on the screen. I played around a lot with the X configuration to be able to use at least X. But I wasn’t successful. I get 1400x1050 pixels or just 640x480.
Accidentally I pressed Fn + F4 in the Grub screen. After that I had the correct resolution on my external screen and the internal TFT got black. Now it is also possible to get the correct X resolution on the external screen. It seems to be a VGA BIOS problem. I will send a support request to HP these days. This trick doesn’t work, if I use a longer cable or a KVM switch between external screen and notebook. I don’t know why.
I don’t know whether the TV output works under Linux. No time to check that yet.
For the touch pad I installed the package xfree86-driver-synaptics. The touch pad is working very well with it and you
have support for the scroll area.
Update 18.08.2005
I now had contact to the HP support concerning the external VGA problem a few days ago. From my point of view this is
definitely a BIOS problem. But HP only answered that this is normal behaviour and I should use Windows XP. Great, does
this guy know that his company wants to sell this notebook with Linux installed??? I don’t think so. Maybe I will try
it with a phone call later.
What I’m doing now is to connect the notebook to the docking station, open the display and press the power button. When the first picture appears, I press Fn + F4 two times (not too fast) so that the internal screen gets black and the external screen shows a picture. Now you can work with the external Monitor. But don’t close the laptop!! Otherwise you get the wrong resolution on the external screen again. By the way, the support guy told me, that the docking station (PA286A) is no docking station. It’s just a port replicator. That’s why the notebook doesn’t get a docking signal.
Anyway, I think the notebook should use the correct resolution for the external screen if you switch it on while it is closed. Maybe some more people have to complain about that. And maybe somebody should ask, why this port replicator has a power button if you have to open the notebook anyway. And why is it called docking station on the HP website?????
Update 09.01.2007
With the recent Xorg server version in Debian testing it is possible to run the X-Server with two displays. I have two
configurations, one using Xinerama and two different resolutions
(1280x1024 for extern and 1400x1050 for intern) but no 3D acceleration. The
other one just uses the internal display and provides 3D acceleration.
Update 10.11.2007
The Intel i810 driver was updated in the latest Xorg server version. It provides much better support for the i915
graphics of the NC6120. The 855resolution tool is not necessary any more, the driver has native support for all
resolutions. Unfortunately the Xinerama configuration does not work any more by using the xorg.conf from above. With my
new configuration, you can set the Xinerama mode by using the following command:
1
xrandr --output LVDS --right-of VGA
I did not find a way to set this automatically yet. My only idea is to put the command above into the .xinitrc file.
Update 15.11.2007
I now found a web page with some explanations regarding Xrandr settings in the xorg.conf file. So it is not necessary
to call the command above manually any more. You can find my new configuration here. The instructions came from
http://wiki.debian.org/XStrikeForce/HowToRandR12.
Power management
ACPI is working good on the NC6120. Suspend to RAM and suspend to disk are working. Standby does nothing and I don’t know what it should do. But for me it is not as important as suspend to RAM/disk. Install the vbetool package for the suspend scripts. It can save and restore the BIOS of the i915 graphics card and is necessary to resume properly.
Suspend to disk
I use the Software Suspend 2 patch to run suspend to disk. How to apply this patch can be read in the updated part of the kernel section.
To run suspend to disk you need the hibernate script. There is an old version included in Sarge, but I use the current
version (1.10). Just run install.sh out of the tar.gz package to install it. My configuration for hibernate is here.
It is not fully tested and optimized yet. But it successfully restores the X session and everything else I am using at
the moment. I think you should read at least the HowTo from the Suspend 2 website to be familiar with possible
problems. There are some pitfalls which might result in corrupted data.
After installing and configuring everything you can run hibernate as root or sudo hibernate as normal user. Pressing the power button will resume the Linux session (if you choose the correct kernel to boot).
Suspend to RAM
For suspend to RAM you don’t need very much. I wrote a small script to go to suspend
and modified the powerbtn.sh
script in /etc/acpi. If you don’t modify the powerbtn.sh script, it will shut down your notebook after resuming. If
you press the power button to resume the notebook, an ACPI event is generated. Since it is a power button event, the
powerbtn.sh script is called and shuts down the notebook.
Frequency scaling
Frequency scaling is working. Everything is prepared in my kernel configuration. I normally use the conservative
scaling governor. Before I used the ondemand governor. I don’t see a big difference between these two. But for me they
are the best solution to save power and have speed when you need it. It is not possible to set one of these governors
as default in the kernel configuration. You have to write a small init script which makes an
echo conservative > /sys/devices/system/cpu/cpu0/cpufreq/scaling_governor.
Undervolting
Thanks to a visitor of my web pages, I got a hint to try Linux-PHC. It is a tool to undervolt the processor for each frequency it can run. This results in a cooler CPU and thus in less noise and less power consumption. It is really great! After the patch for Linux-PHC is applied, you have to search for each frequency for the lowest voltage ID (VID) you can use without a crash. On my notebook, the default VIDs for the 5 different frequencies were set as follows:
| Frequency (kHz) | 1.867.000 | 1.600.000 | 1.333.000 | 1.067.000 | 800.000 |
| orig. VID | 41 | 36 | 30 | 24 | 18 |
| orig. Voltage (V) | 1,3560 | 1,2760 | 1,1800 | 1,0840 | 0,9880 |
| my VID | 19 | 13 | 7 | 2 | 0 |
| my Voltage (V) | 1.0040 | 0.9080 | 0,8120 | 0,7320 | 0,7000 |
This works stable as far as I tested it. Now, even under full load with the highest frequency, the fan only runs with very low speed.
Modem
I read on this site that it works, I didn’t check that. It doesn’t work with the snd-i8x0m driver included in kernel 2.6.12. But there is a slamr kernel module available at http://linmodems.technion.ac.il/packages/smartlink/. I had no time to check that yet.
Sound
Sound is working very good without much trouble. The driver module is called snd_intel8x0 (not snd_intel8x0m !). Just run alsaconf.
Bluetooth
Bluetooth is running. I didn’t transfer files or any data yet, but can scan the environment and my notebook can be found by other devices. All necessary modules are loaded automatically at boot time. If they are not loaded and you use my kernel configuration, maybe you have to start Windows and enable the Bluetooth interface. Don’t mix this up with the settings in the BIOS. If the Bluetooth device is disabled in Windows, the BIOS settings have no influence on it and you can’t use it under Linux. I don’t know whether there is a way to enable the Bluetooth device under Linux.
I installed the following packages to use Bluetooth: bluez-utils, bluez-firmware, bluez-hcidump, bluez-pin, obexserver, openobex-apps.
Irda
Not tested yet, but modules are loaded automatically.
Update 18.01.2009
I have connected to a Nokia 6101 mobile phone via infrared today. It works fine. The modules irtty_sir, sir_dev and
irda get automatically loaded at boot time. After using the commands setserial /dev/ttyS2 irq 3 and
irattach /dev/ttyS2 -s you should be able to see the visible devices by looking at the file /proc/net/irda/discovery.
Now gnokii or wammu should be able to connect to the phone, if it is generally supported.
USB
Works out of the box. In my case there was nothing to configure. But I didn’t check USB 2 yet.
1394 Firewire
Works fine. It uses the following modules: ieee1394, ohci1394. The module eth1394 is also loaded, but I didn’t test a network connection over Firewire. I just connected two external hard disks and could handle them like USB devices.
PCMCIA
Works. I tested it with my CF GPS card via an adapter. Other devices may follow.
DVD/CD-Burner
Works perfectly without any changes.
Multi card reader
Does NOT work :-(.
Update 09.01.2007 Since Kernel 2.6.19 there is a driver included. It is called tifm. At the moment there is basic support for SD and MM cards. More cards will, hopefully, follow. The whole driver is still experimental, so be careful!
Pictures
Here I put some more detailed pictures of my notebook. I hope that they show enough details.

This is the left side of the notebook. You can see here (from left to right): 2 USB ports, VGA output, modem, LAN,
Firewire and 2 CardBus slots.

On the right side you have connectors for earphones, a microphone input, 2 USB connectors, the CD-RW/DVD combo drive
and a serial connector.

Most space on the back of the notebook is taken by the battery pack in the middle. On the left side is a small hole for
a Kensington cable. On the right side is the power connector, a parallel port and the TV output.

The front of the notebook includes 2 speakers (left and right side), the card reader in the middle and the Irda port
on the left side. There are also LEDs for wireless LAN/Bluetooth, power, charging indication and hard disc access.
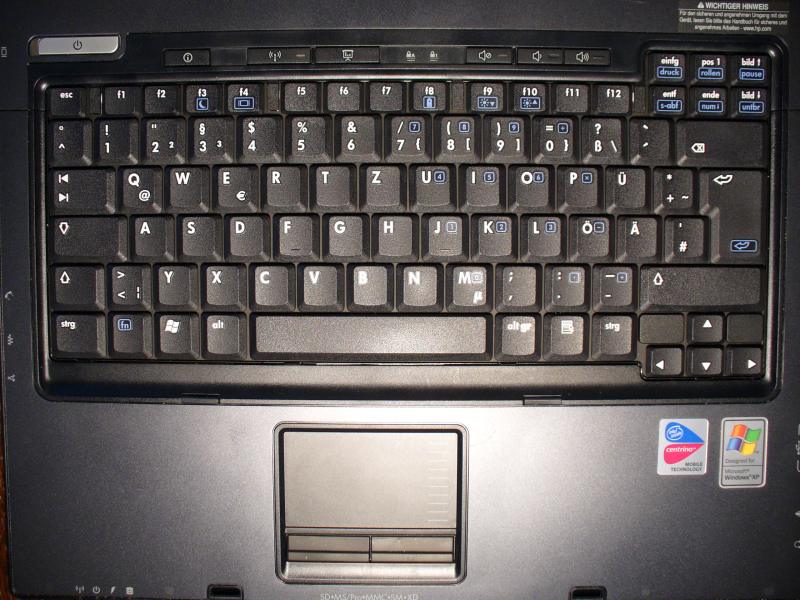
Here a picture of the keyboard and touch pad. On the top you can see the power button and some special buttons, for
example to enable/disable wireless LAN/Bluetooth or adjust the volume.
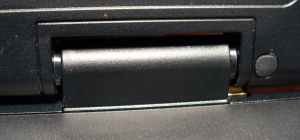
Here you can see one of the hinges. I think they are very stable.
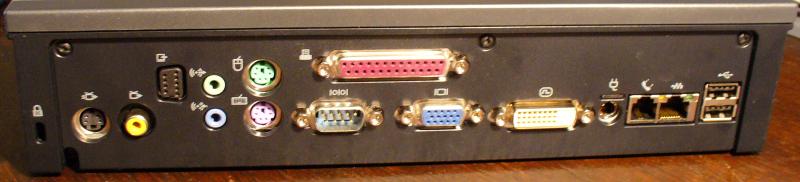
This is my docking station (PA286A). In fact it is only a port replicator. You have connectors for a Kensington cable,
2x TV out, a special monitor (I don’t know this type), Audio out/in, PS/2 mouse and keyboard, parallel port,
serial port, VGA, DVI, power, modem, LAN and 2 USB ports. There are two more USB ports on the left side. One of them
is powered.

And this is the connection mechanism of the docking station. It works good.
This report is listed on Linux on Laptops and TuxMobil.